Hey there, lovely readers! Are you looking for some inspiration for your next quick weave styles with curly hair? Look no further! In this blog post, we’ll be exploring some fantastic and trendy quick weave styles that are perfect for those with naturally curly hair.
As someone who loves experimenting with different hairstyles, I understand the struggle of finding the perfect style that complements your curly hair. That’s why I’ve compiled my favorite quick weave with curly hair that will make you feel confident and beautiful.
Whether you’re looking for a new style for a special occasion or just want to switch things up, quick weaves are a fantastic option. They’re easy to install, require minimal maintenance, and can last for weeks with proper care. Plus, they offer endless possibilities when it comes to styling.
So,grab a cup of coffee or tea, sit back, and let’s dive into some of the most beautiful and fashionable quick weave styles with curly hair that you can try out today!
Curly hair quick weave styles
With these quick weave styles with curly hair, you can instantly elevate your style and transform your entire look. Who doesn’t love a curly hair moment? Whether you’re looking to create a sexy, practical, fun, or flirty hairstyle, a curly weave has got you covered. Take a look!
>> READ MORE: Fast and Fabulous: Quick Weave Hairstyles to Try Today
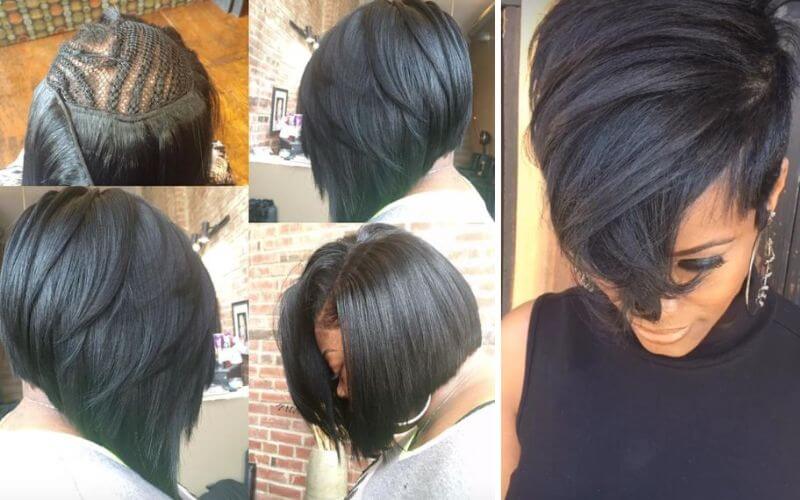
27 piece quick weave with curly hair

A 27 piece quick weave curly hair is a type of curly quick weave hair that uses 27 pieces of hair extensions, which are glued onto a person’s head to create a short, curly haircut. Here’s a breakdown of the steps needed to create this style:
- Purchase the necessary supplies. You will need 27 pieces of hair extensions, a holding spray, a black stocking cap, glue, a razor comb, and clippers.
- Braid your natural hair into small braids, making sure they are flat to the head.
- Apply the holding spray all over your hair to protect it from the glue.
- Put on the black stocking cap to help flatten the braids and protect your hair from the glue.
- Use the glue to attach the hair extensions to the cap. Place the shorter pieces of hair on the sides first and then use the longer pieces for the middle.
- Use a handheld mirror or two mirrors to help you see the back of your head.
- Use the razor comb to cut the hair extensions to your desired length and shape.
- Use clippers to trim the hair extensions to create a tapered look.
- Apply more glue to the areas where you want to add additional hair extensions.
- Use the razor comb to blend the extensions and create a natural-looking hairstyle.
Note: Be careful when using scissors to cut the extensions, as they can be sharp and may cut your skin. It is recommended to use clippers or a razor comb instead.
Curly hair quick weave no leave out – Ponytail

It is important to take the following steps in order to create this hairstyle:
- Apply a liquid protectant, such as the Wonder Wrap from Argan Oil, all over the head, as if gelling the hair into two ponytails.
- Redo the ponytails to ensure they are secure.
- Blow-dry the hair using high heat.
- If rocking two short puffballs, apply product to them and bring them together to make one ponytail.
- Apply extra liquid protectant where the tracks will be placed to create an illusion.
- Place a stocking cap over the ears, cut holes around the ears, and ensure it stays in place using Got2b spray.
- Trace and cut where the part is to lay the tracks.
- Apply three packs of Shake and Go, Oprah Curl, and milky way brand hair from the nape and work ear to ear, double the tracks as you get closer to the top.
- Overlap the tracks horizontally to create an illusion part.
- Close off the heavier side by placing the wefts vertically, a little bit close to the hairline, but not on it and curving it.
>> RELATED TOPIC: Upgrade Your Hair Game With These Stunning Half Up Half Down Hairstyles Weave
Quick weave curly hair no leave out – Flip Over Method
To get this quick weave no leave out curly hair design, these points are going to help you.

- Start with freshly washed and stretched hair.
- Cornrow your hair in sections. Have the front section and back section separate.
- Cut off a small piece of the 18-inch track and cut off the weft. Pull out the excess hair at the top, and use this as your fake leave out.
- Take the hair and cornrow it into the front perimeter of your head. Make larger cornrows on the sides with the two strands of hair. Use three strands as you get closer to the middle to give yourself more coverage where your hairline will be most exposed.
- Do larger braids in the back and braid the front braids into them.
- Put on the wig cap and make sure the front hair is hanging forward and out of the way. Mark off exactly where your hairline is using a white eye pencil or something similar.
- Apply the protective shield. Start in the middle of your head and brush out from there to prevent the shield from getting on the hair in the front. Apply layer after layer of the shield on the hair until it is fully protected.
- Use a blow dryer to dry the hair.
- Apply the longest bundle first at the nape of the neck. Measure it to the length you want, cut it, apply the hair glue, and stick it to your head. Make sure the tracks are close together, especially as you reach the top, to prevent gaps and exposed tracks.
- Once you get to about a couple of inches in or when you have about a couple of inches of space left, start laying the tracks across and cut them to fit.
- Once you have applied all the tracks, cut the hair into a desired style and flip the hair over.
- Note that the protective shield and hair glue can make the hair crunchy if it gets on the hair in the front, so it is important to mark off exactly where you want to stop with the glue.
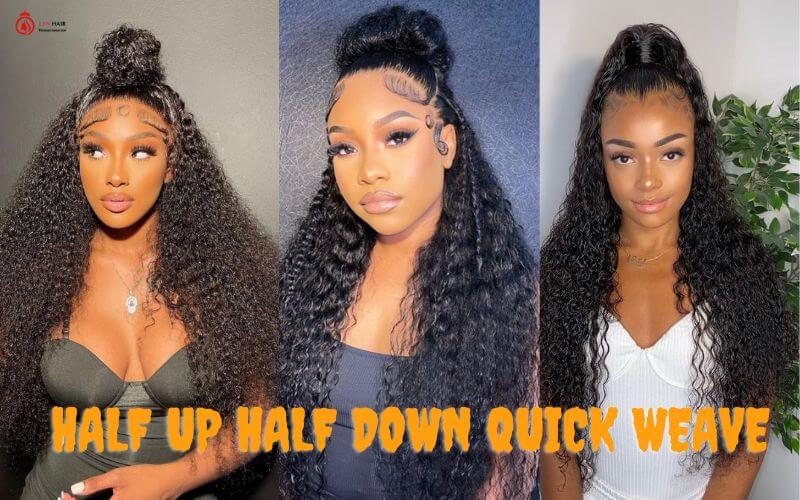
Half up half down quick weave with curly hair – Ponytail

We are going to mention some of the easy steps to create half up half down curly hair weave with a ponytail.
- Section off the hair where you want your ponytail to be. Make sure it’s a good size and not too small.
- Braid the hair all the way around, connecting the braids as you go to the next braid. You can also crochet the braids if you prefer.
- Apply a stocking cap to your head and spray it with Got2B spray until it’s completely soaked. Blow-dry it until it’s dry and white.
- Apply a second stocking cap and repeat the process.
- Cut off the top of the second stocking cap to use as a guide for placing your tracks.
- Use two packs of Dominican Curly five-piece pack by Ultra, keeping the tracks double. Start applying the tracks a little past your ear and curve them up to create a “c” shape. Continue the curve until you reach the back of your head, making the tracks smaller and smaller as you go.
- Cut off any excess cap and use a light amount of hair glue if necessary.
- Section off a slice from just the side of your ponytail and apply edge control to create a slick ponytail.
- Wrap a folded paper strip around the beginning of your ponytail to protect your hair from glue.
- Glue the tracks onto the ponytail, making sure they’re securely in place.
- Style your hair as desired.
Conclusions
To conclude, quick weave styles with curly hair are an excellent way to switch up your look and celebrate your inherent beauty. Whether you desire a flirty, practical, fun, or sexy style, curly weave styles can cater to your preferences. These styles are easy to install, require minimal maintenance, and can last for weeks with proper care. This article has showcased some fantastic and trendy quick weave styles. By trying out one of these styles, you can instantly elevate your style and transform your whole appearance.

